
Add specially formatted text that can be positioned anywhere within the contents of your document, specifying the size, location and type of fields.
Step 1
From the dashboard, go to User Guides, the Add-ons category and then find the ‘Add data tags’ guide.

Step 2
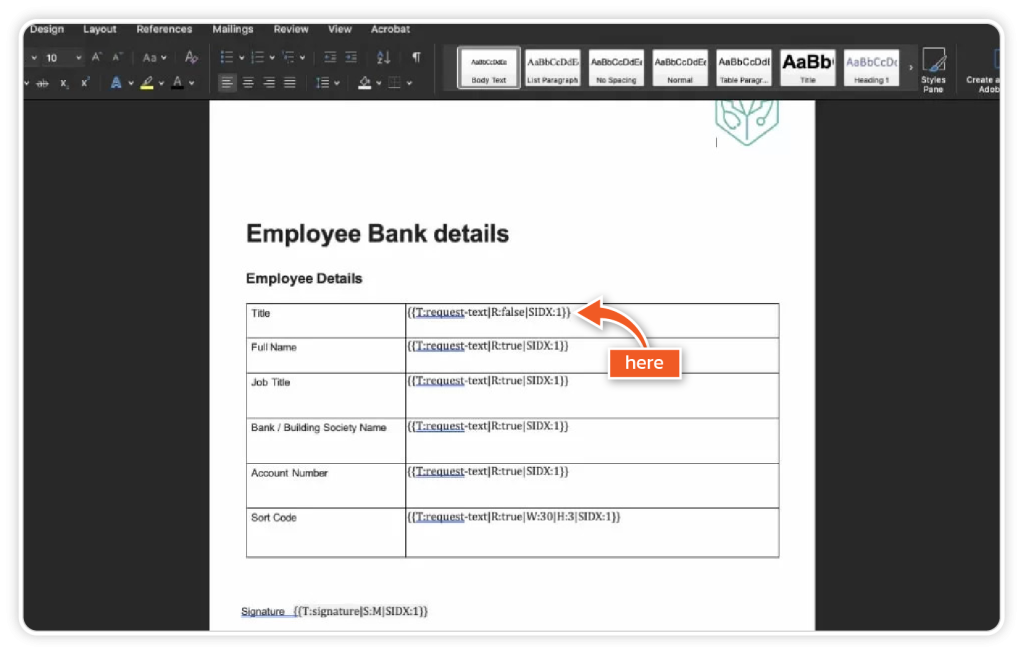
Open your document on your device and insert the data tags in the correct place on your document. For one signer, use the code SIDX:1 and save the document once completed.
Step 3
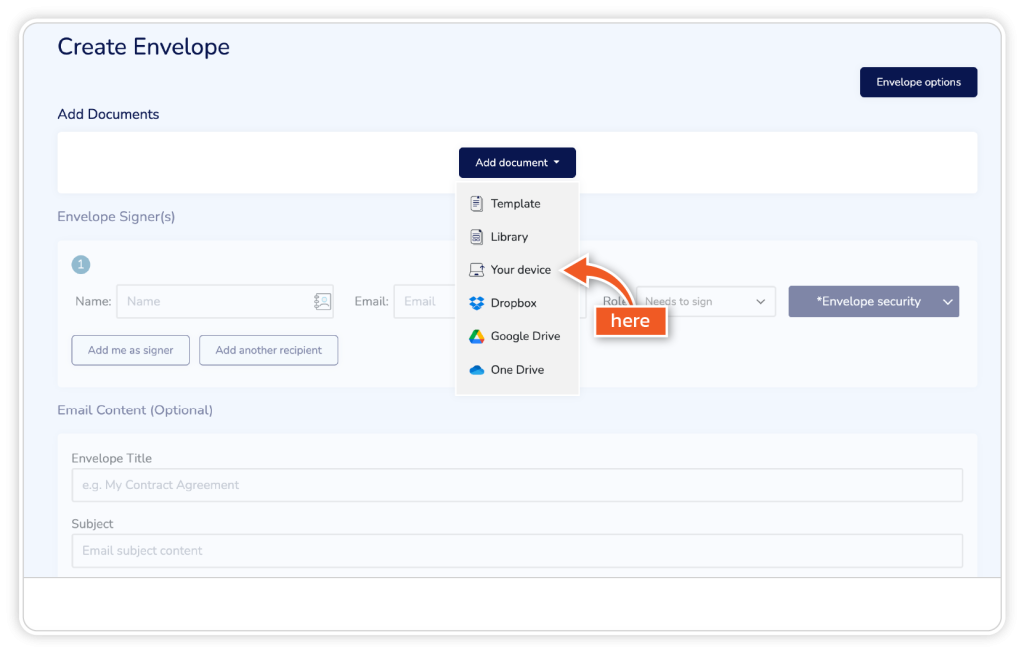
Upload the document to eSign for signing via ‘Get Started’ or ‘Library’.
Step 4
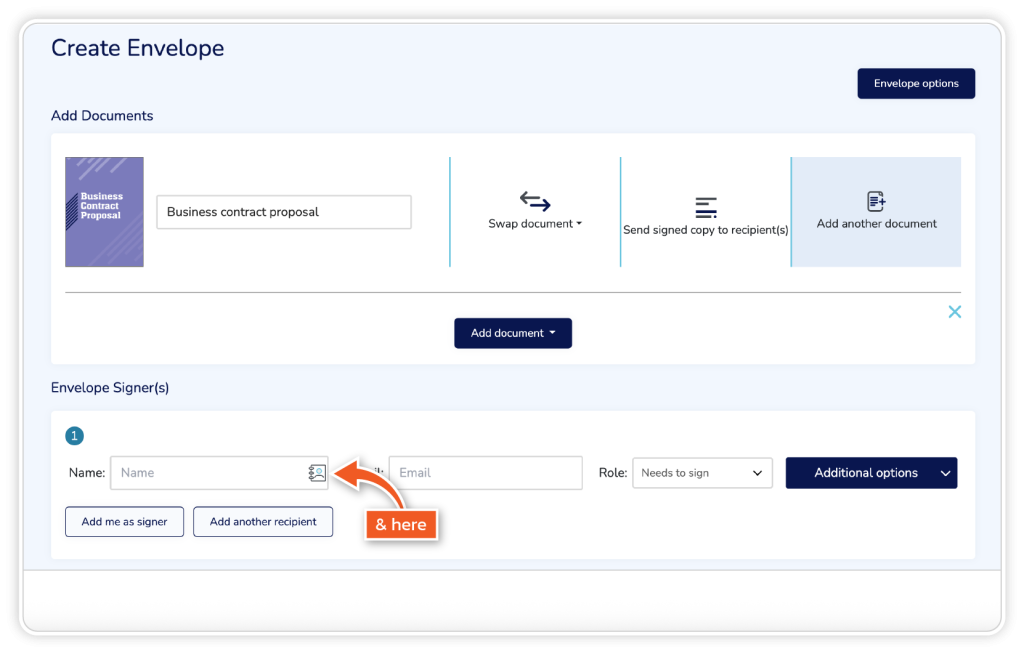
Add one recipient in the Envelope Signer(s) section and click ‘Continue’.
Step 5
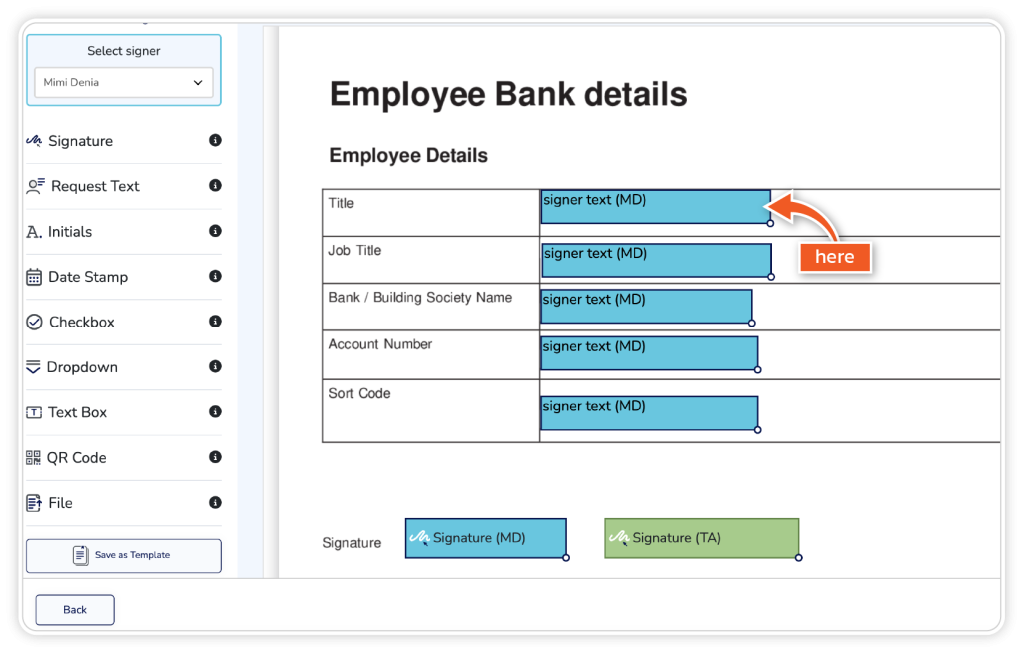
The data tags will be picked up and show the relevant fields in the document.
Data tag format examples
Data Tag: request-text
{{T:request-text|R:true|SIDX:1}}
{{T:request-text|R:false|SIDX:1}}
{{T:request-text|R:false|SIDX:2}}
{{T:request-text|R:true|W:30|H:3|SIDX:1}}
R = Required
SIDX = Signer
H = Height
W = Width
Data Tag: signature
{{T:signature|S:M|SIDX:1}}
The above examples will appear as a medium-sized signature.
Data Tag = add-text
{{:add-text|W:30|H:3|TXT:}}
{{T:add-text|TXT:}}
H = Height
W = Width