The company eSeal is a digital seal used to formally validate documents. For security and compliance reasons, the eSeal is available to administrators only.
This guide explains both how to apply the company seal and how to complete the signing process.
Before you begin:
- Ensure you are logged in with an administrator account.
- Confirm that the document you are uploading is final and ready for sealing, as changes after sealing may invalidate the document.
Applying the company eSeal
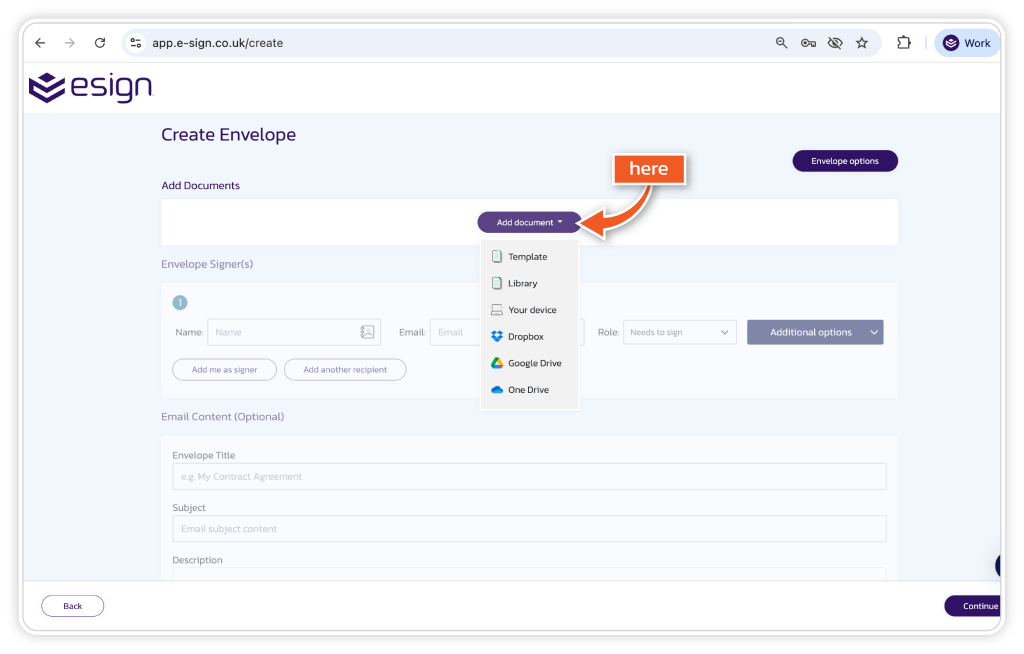
1. Upload the document
Upload the document you want to add the eSeal too.
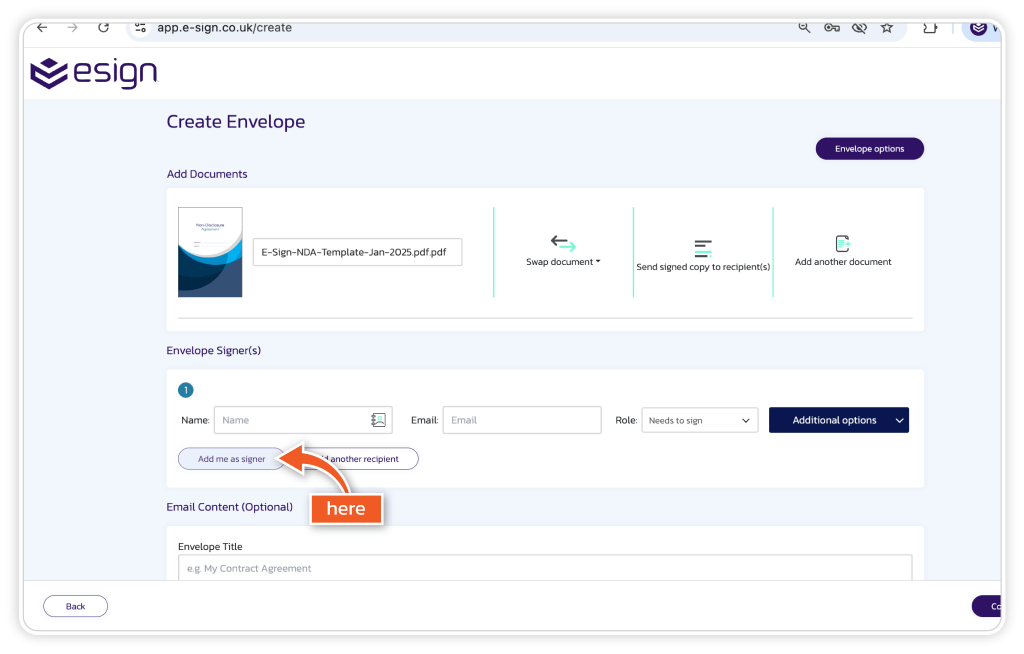
2. Click ‘Add me a signer’
Click ‘Add me as a signer’ to assign yourself as the person responsible for applying the company seal. This ensures the system recognises you as the authorised user for sealing the document.
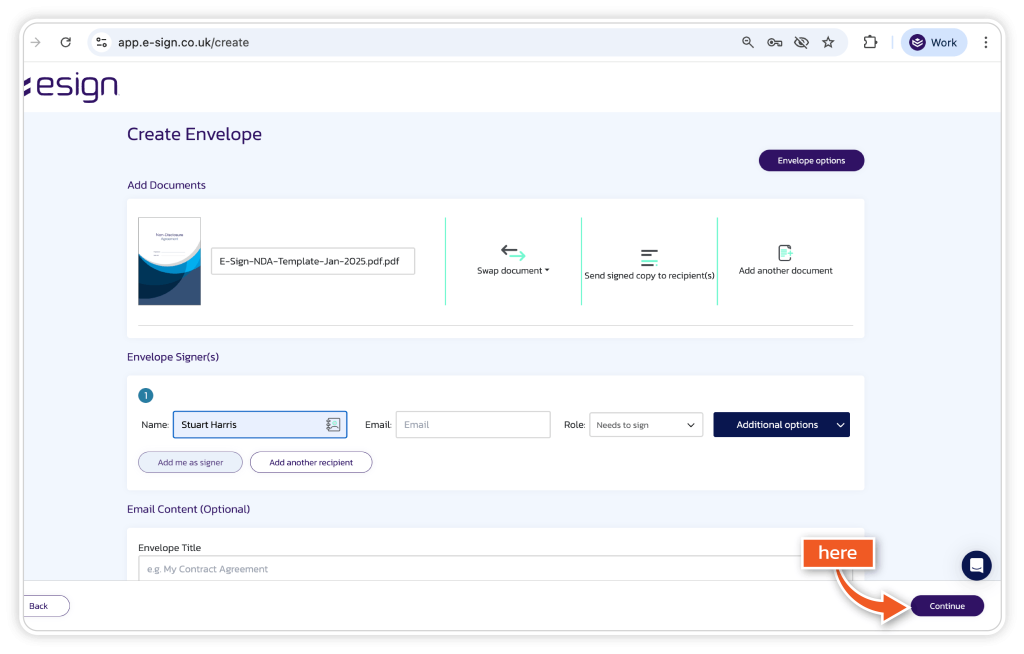
3. Select ‘Continue’
Select ‘Continue’ to proceed to document preparation, where you can place the required elements on the document.
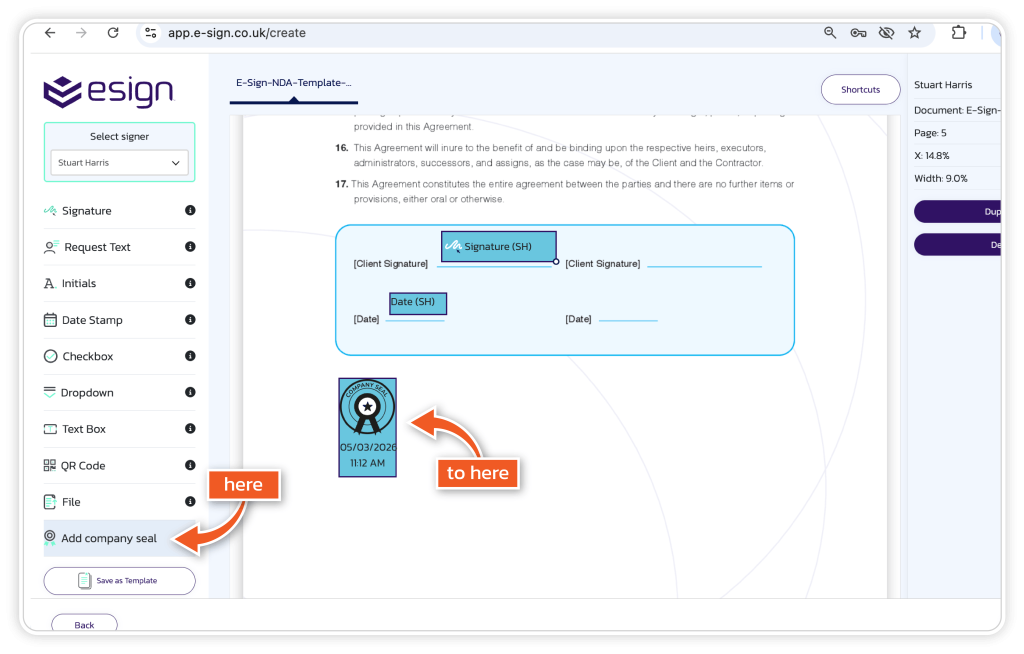
4. Drag and drop the eSeal field
Drag and drop the eSeal field onto the necessary location on the document.
- Best practice: Place the seal in a visible area, such as near the signature section or at the end of the document.
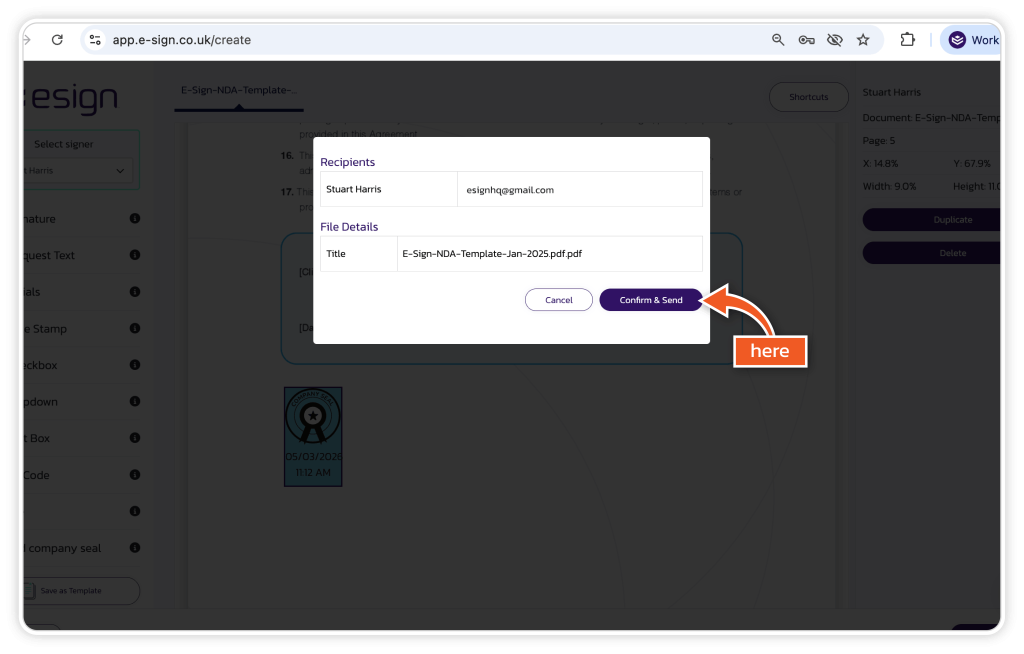
5. Send the document
Click ‘Continue and send’ to finalise the set up and move the document to the signing stage.
Complete the Signing Process
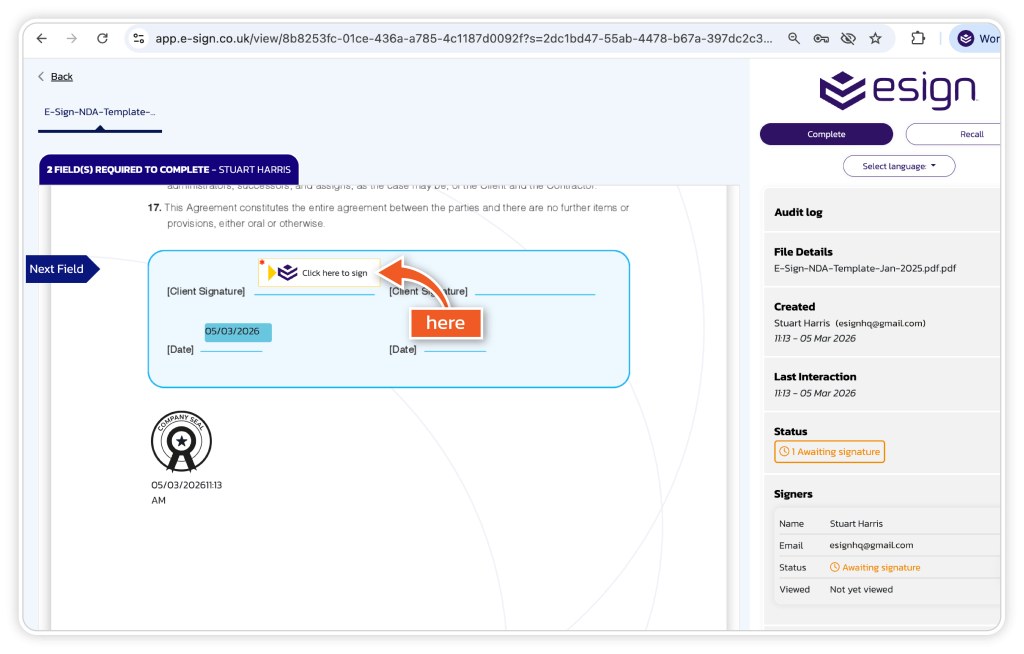
Once the document has been sent, follow these steps to apply the eSeal.
1. Click ‘Complete’
Open the document and click ‘Complete’ to begin the signing and sealing action.
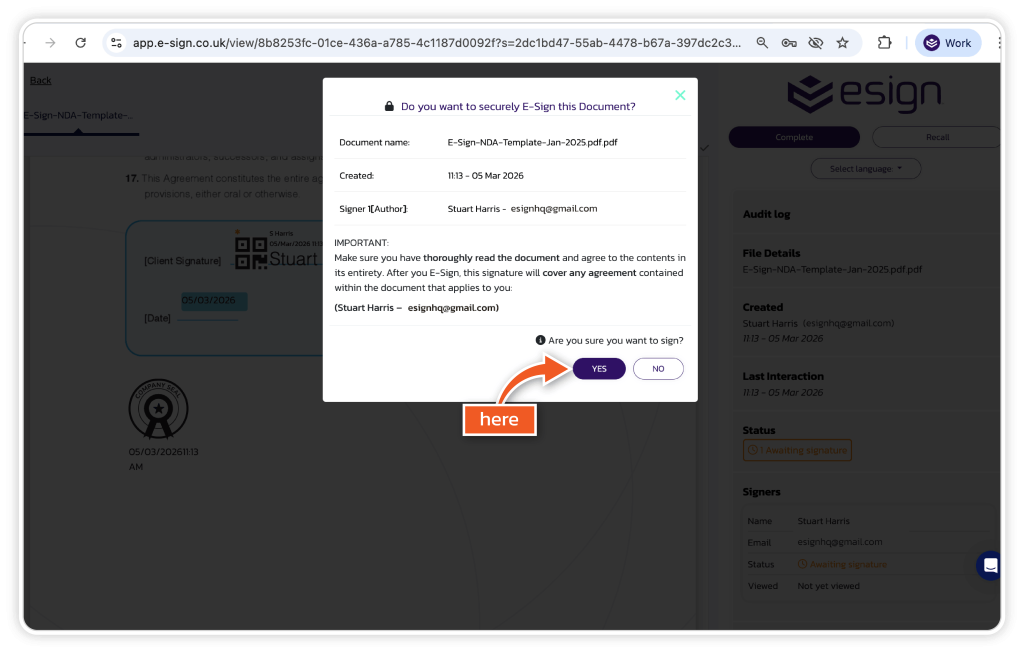
2. Confirm the action
You will be asked to confirm that you want to sign and apply the eSeal. Confirming these steps authorises the use of the company eSeal.
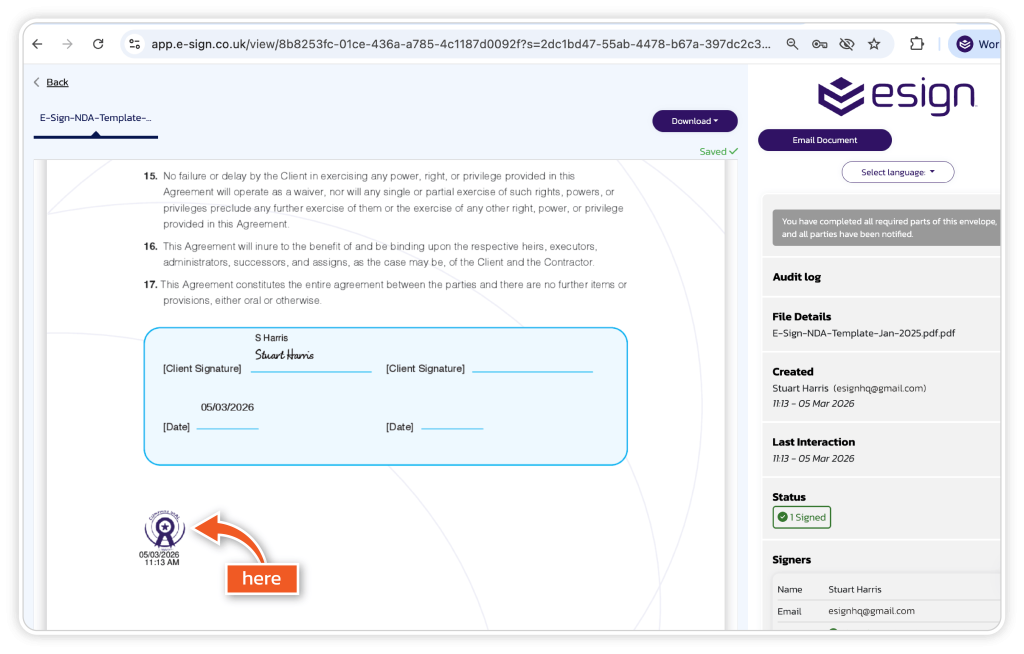
3. eSeal applied
After confirmation, the company seal will automatically appear on the document in the location you selected.
The document is now officially sealed and completed.