Integrations are available on Enterprise plans.
Integrate eSign with Salesforce to simplify your workflows and get your sales documents signed quickly and seamlessly.
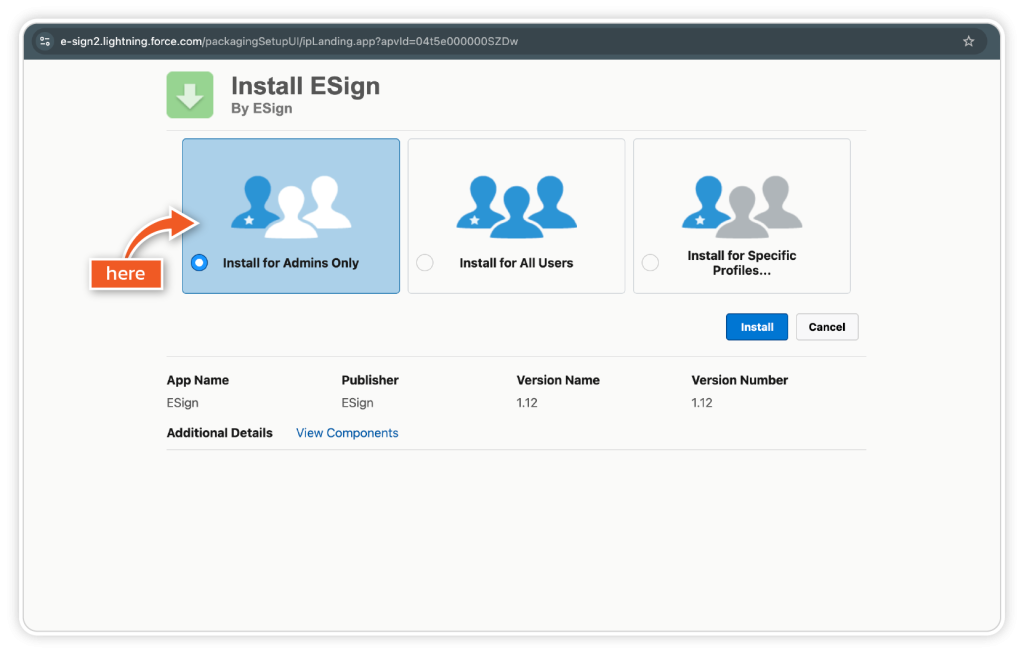
Step 1
Once you have downloaded the E-Sign plug-in, click ‘Install for Admins only’.
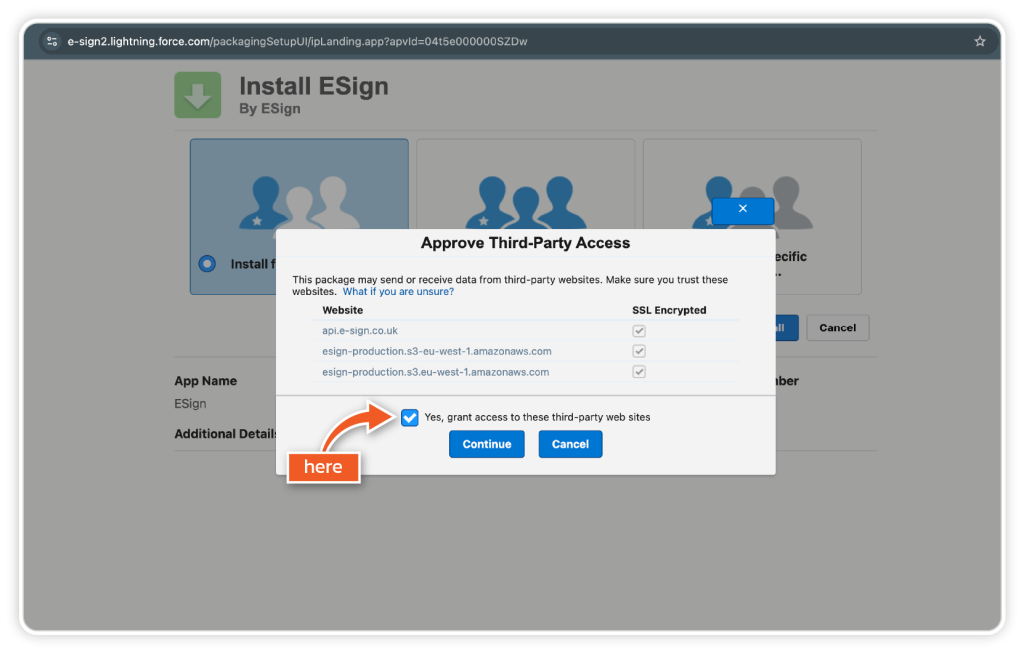
Step 2
Ensure that you grant access to the third-party eSign platform.
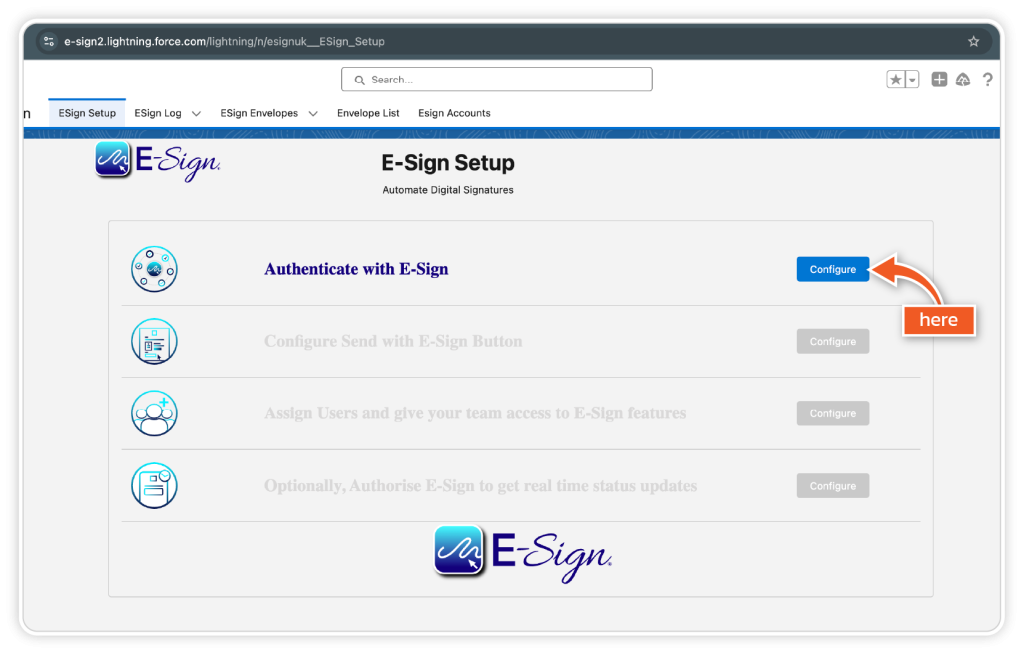
Step 3
Here, you will be prompted to the eSign setup page. To authenticate your eSign account, click ‘Configure’.
Step 4
Here, you will have the option to log in to your eSign account. A pop-up window will appear, prompting you to enter your login details.
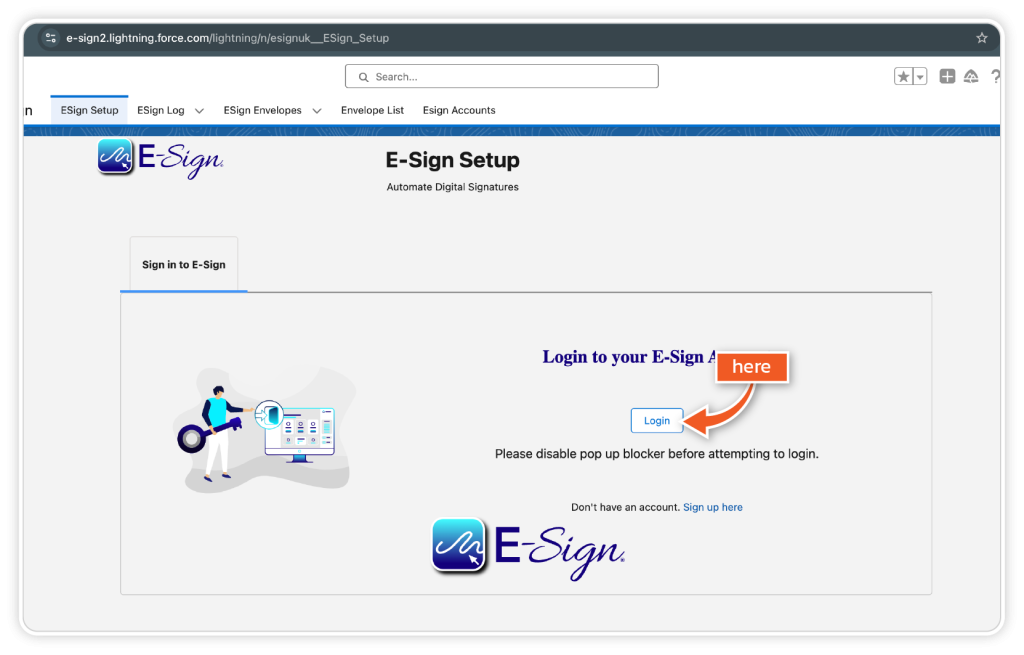
Step 5
Once you have entered your eSign login details, click ‘Next Step’.
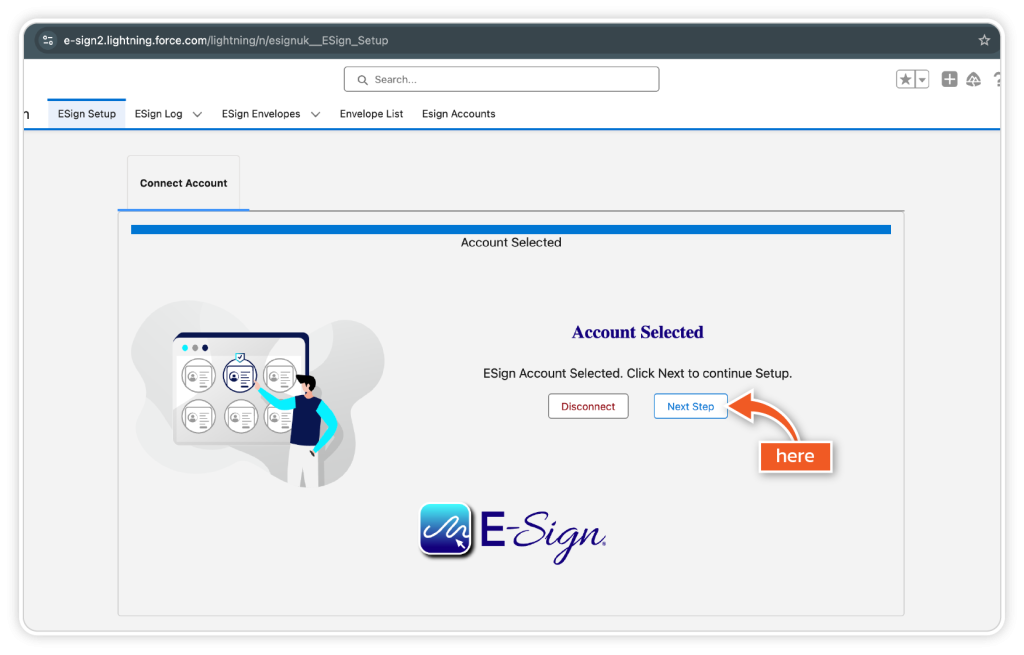
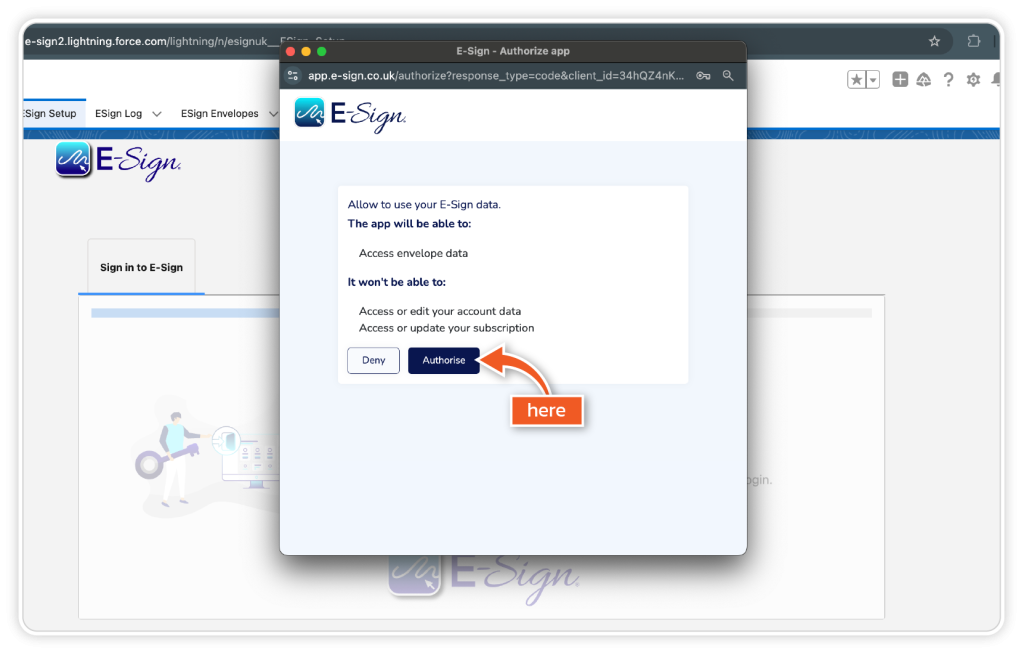
Step 6
Click ‘Authorise’ to grant access to your eSign account.
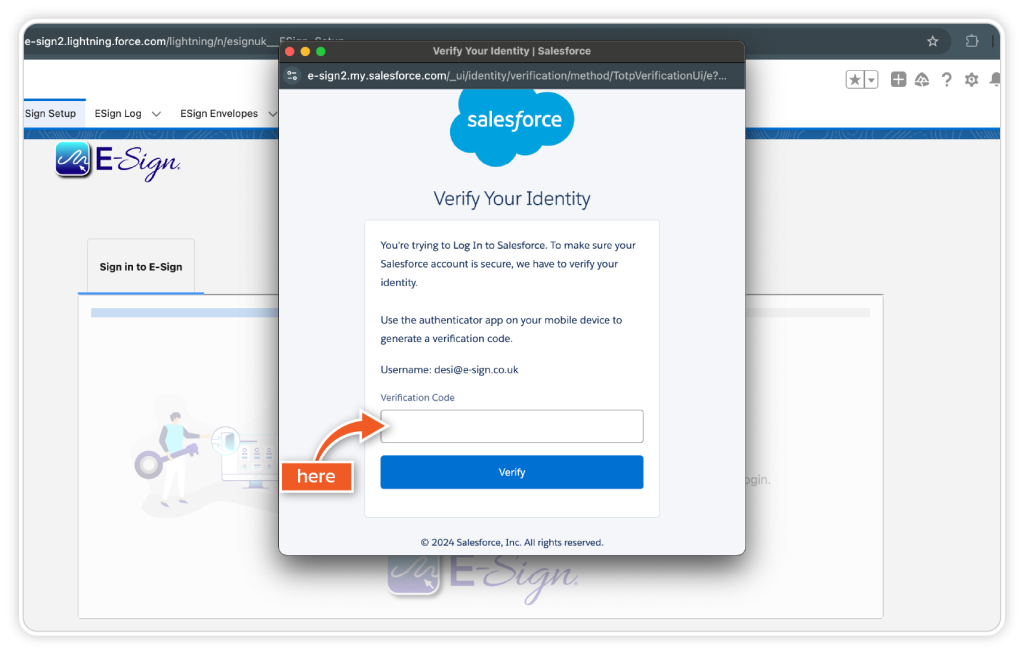
Step 7
You will then be required to re-enter your Salesforce login details. You may also be required to verify your identity using an authenticator app.
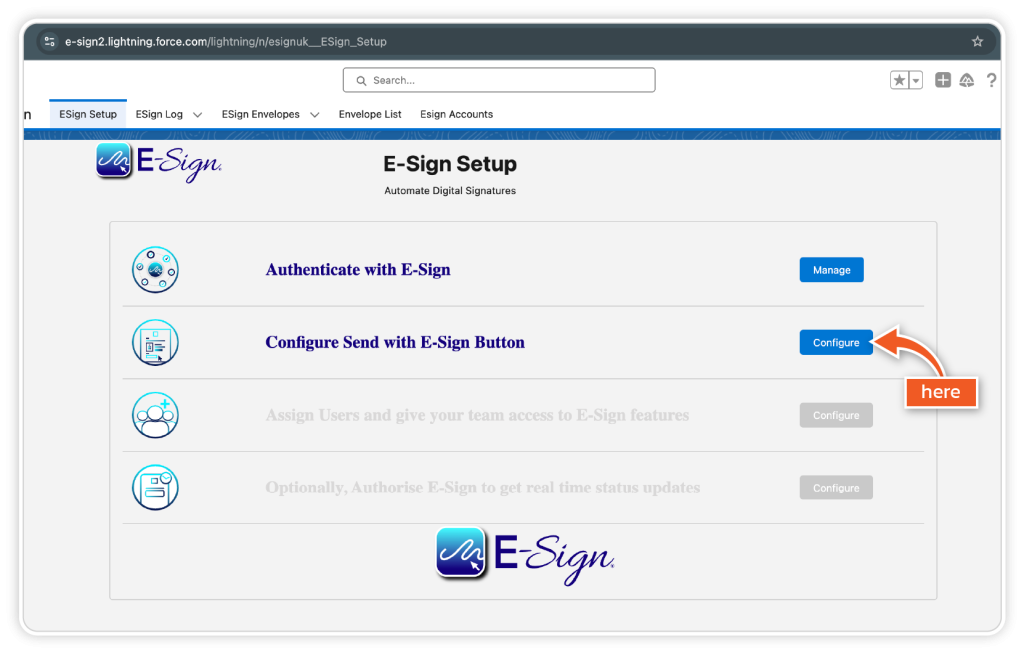
Step 8
To enable the ‘Send with eSign’ button, click ‘Configure’.
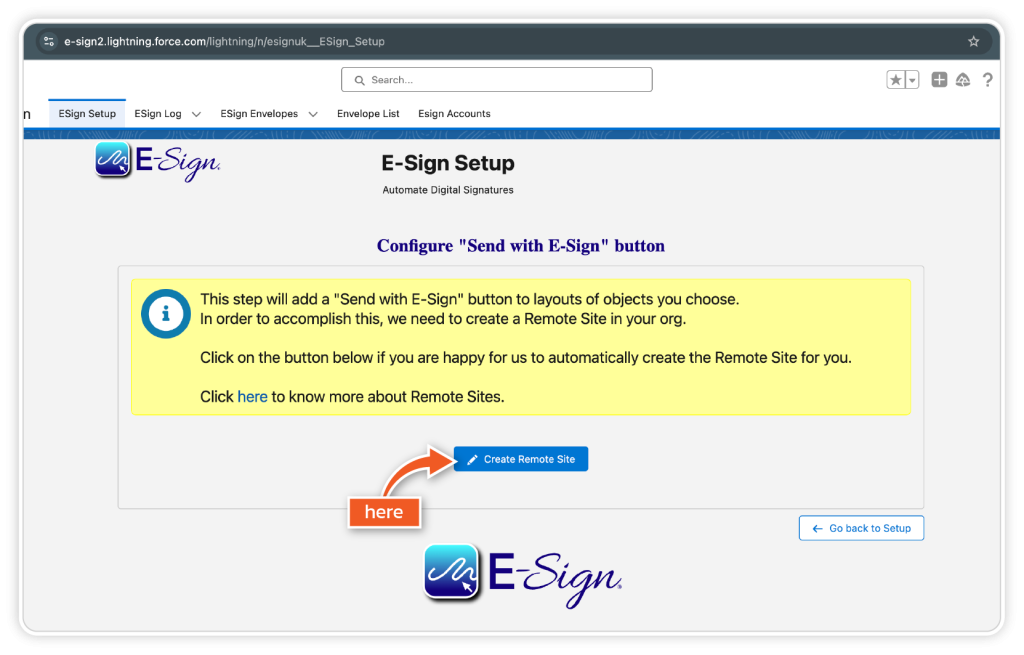
Step 9
To complete this step and create a remote site in your Salesforce organisation, click ‘Create Remote Site’.
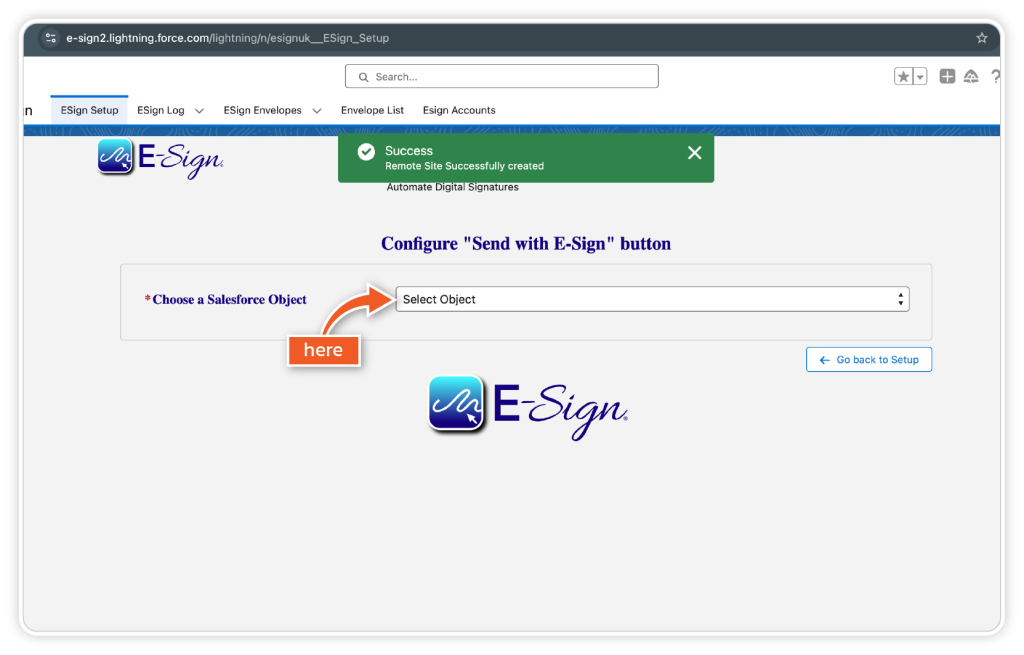
Step 10
Once this is completed, you will be required to choose the Salesforce object on which the ‘Send with eSign’ button will appear.
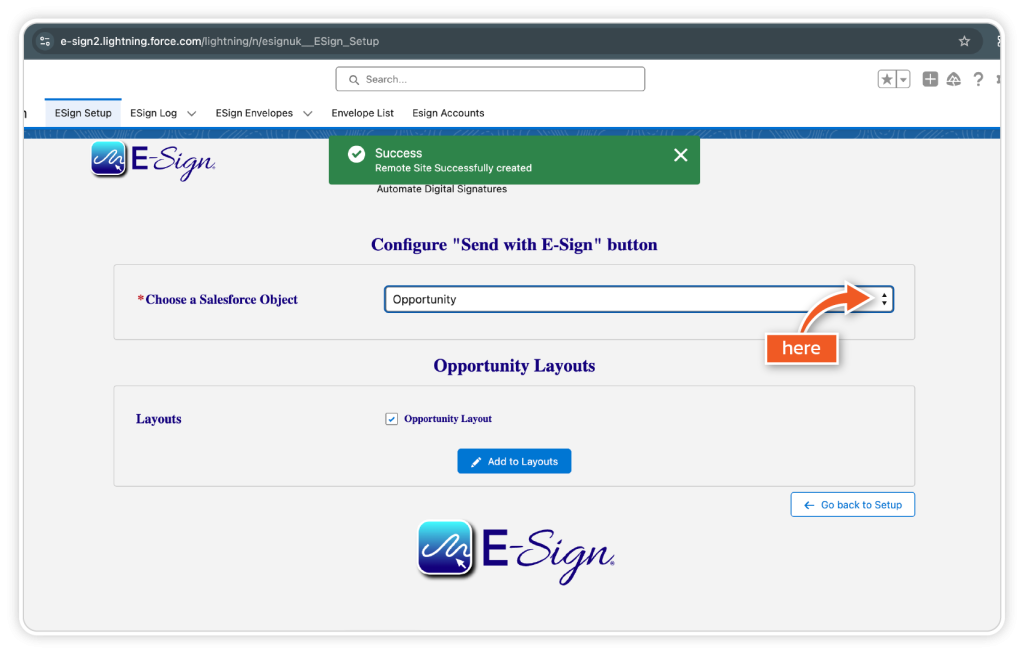
Step 11
Please select the object(s) that you wish to have the Send with eSign button available. For example, opportunity, leads and accounts.
Step 12
Once complete, you can assign users and give your team access to eSign features within their Salesforce accounts.
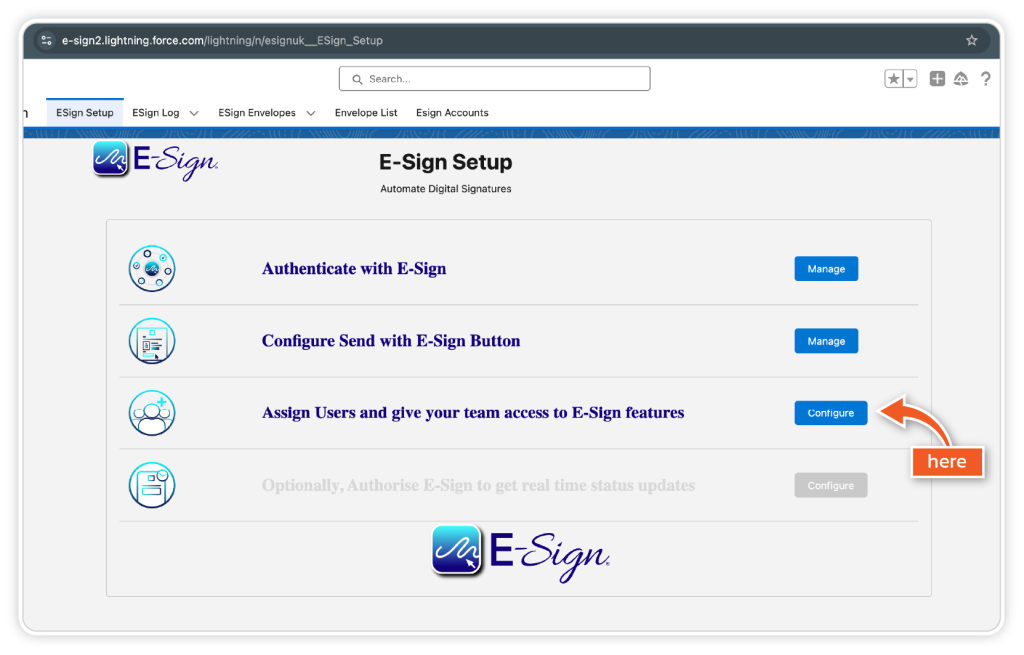
Step 13
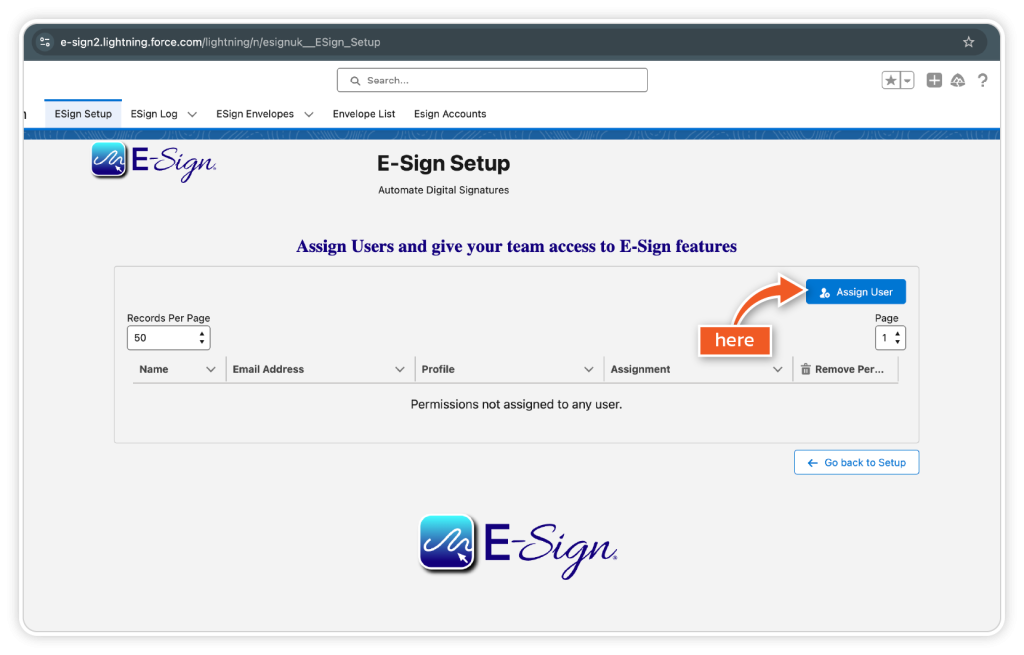
Here, you can assign users and permissions for your team members.
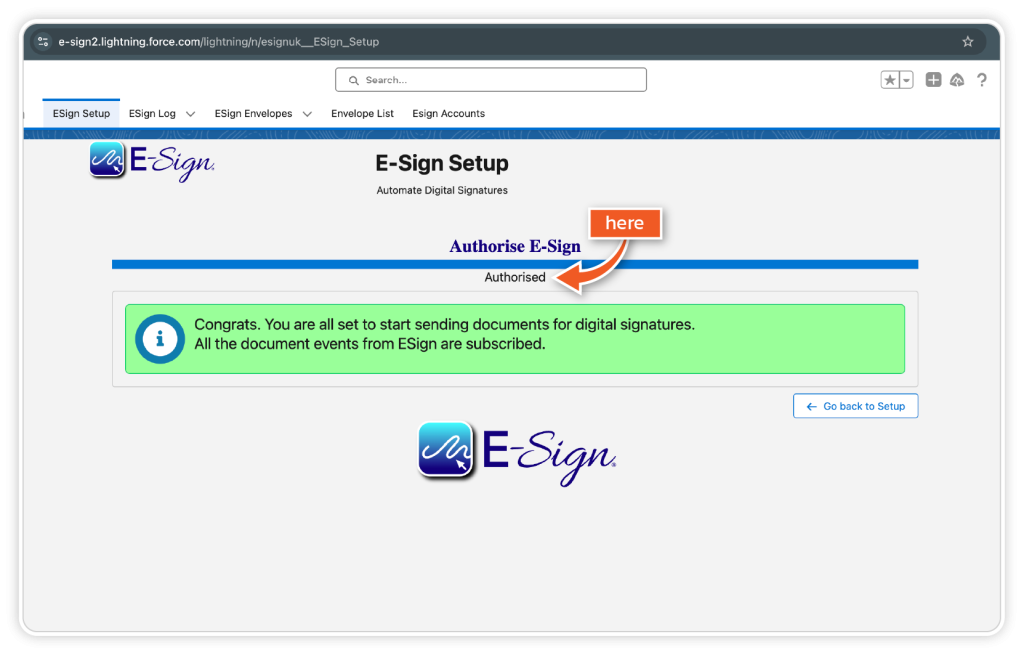
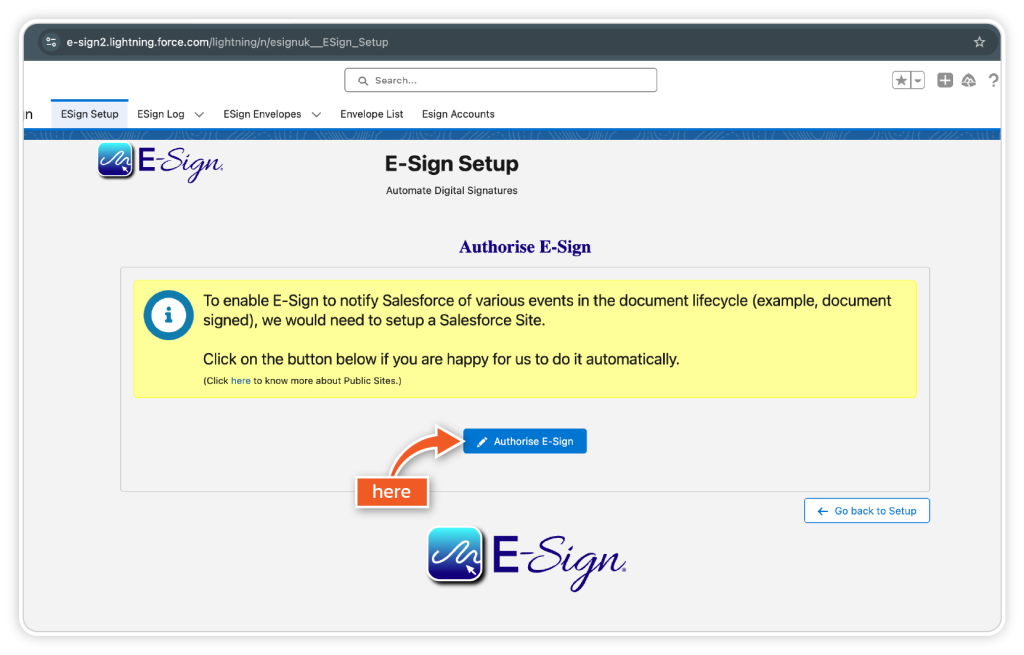
Step 14
Click ‘Authorise eSign‘ to set up the Salesforce site. This will enable E-Sign to notify Salesforce of events in the document lifecycle.
Step 15
Now you will be set up and ready to start sending documents for signature within Salesforce.